Setting Up Virtual Classrooms: A Complete Guide for Schools (2026)
Table of Contents
- The Post-Pandemic Virtual Classroom Reality
- Choosing the Right Virtual Classroom Platform
- Technical Setup: Step by Step
- Building a Teacher Training Program
- Student Onboarding That Actually Works
- Managing Virtual Classroom Behavior
- Accessibility Requirements and WCAG Compliance
- Bandwidth Planning for Schools
- FERPA Compliance for Virtual Classrooms
- Frequently Asked Questions
- Key Takeaways
The Post-Pandemic Virtual Classroom Reality
Virtual classrooms are no longer an emergency measure. They are permanent infrastructure. When schools scrambled to go online in 2020, the expectation was that video-based instruction would disappear once students returned to physical buildings. That did not happen. According to the National Center for Education Statistics 2025 report, 74% of K-12 school districts in the United States now operate some form of virtual or hybrid instruction as a standard part of their academic program.
The reasons are structural, not temporary. Snow days have been replaced by virtual learning days. Students with chronic illnesses maintain attendance through live-streamed classes. Rural districts share specialized teachers across multiple schools via video. Tutoring programs, parent-teacher conferences, IEP meetings, and professional development sessions all run on virtual classroom platforms as a matter of routine.
But there is a significant gap between using a virtual classroom platform and using it well. Many schools adopted tools hastily in 2020 and never revisited those decisions. They are running outdated configurations, paying for features they do not use, missing accessibility requirements, and operating outside FERPA compliance without realizing it.
This guide walks through virtual classroom platform setup from the ground up. Whether you are choosing a platform for the first time or rebuilding a system that was assembled in a crisis, these steps will get your school district to a configuration that is technically sound, legally compliant, and genuinely usable for teachers and students.
Choosing the Right Virtual Classroom Platform
The platform decision is the foundation of everything that follows. Selecting the wrong tool creates problems that no amount of configuration can fix. The right choice depends on your district's size, budget, technical capacity, and specific instructional needs.
Zoom Education
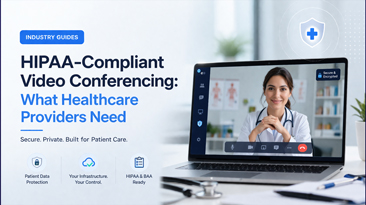
Zoom remains the most widely recognized name in video conferencing, and their education-specific tier includes features like breakout rooms, polling, whiteboard integration, and attendance tracking. The interface is familiar to most teachers, which reduces training overhead. However, Zoom Education is a subscription service. For large districts, per-user licensing costs add up quickly. Data is processed on Zoom's cloud servers, which means you are trusting a third party with student data and accepting their privacy terms as they evolve.
Google Classroom + Google Meet
For districts already invested in Google Workspace for Education, the combination of Google Classroom and Google Meet is a natural fit. Classroom handles assignments, grading, and communication, while Meet provides the live video component. The integration is seamless. The limitation is that Google Meet's video conferencing features are less robust than dedicated platforms. Breakout rooms, advanced moderation tools, and recording management are more basic. You are also operating entirely within Google's ecosystem, which some districts view as a data sovereignty concern.
Microsoft Teams for Education
Teams offers deep integration with the Microsoft 365 suite, making it attractive for districts that use Outlook, OneDrive, and SharePoint. Teams for Education includes class notebooks, assignment management, and built-in moderation features. The platform is powerful but complex. Teachers consistently report a steeper learning curve compared to Zoom or Google Meet. For districts with dedicated IT support, Teams works well. For smaller districts without that support, the complexity can become a barrier.
BigBlueButton
BigBlueButton is an open-source virtual classroom platform designed specifically for education. It includes a built-in whiteboard, shared notes, breakout rooms, and polling --- all purpose-built for instructional use. Because it is open source, you can self-host it and maintain complete control over student data. The tradeoff is that self-hosting requires server infrastructure and technical staff to manage it. BigBlueButton does not offer a managed cloud service with the same level of support as commercial platforms.
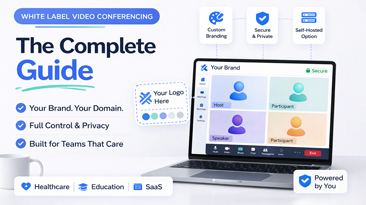
WhiteLabelZoom
WhiteLabelZoom occupies a distinct position in this landscape. It provides a fully brandable, self-hosted video conferencing platform that schools can deploy under their own domain and identity. The platform runs on your infrastructure, which means student data never passes through a third-party cloud. You get enterprise-grade video features --- breakout rooms, recording, screen sharing, moderation, and whiteboard --- without the per-user subscription model. For districts that need the functionality of Zoom but the data control of self-hosting, WhiteLabelZoom eliminates the compromise between capability and compliance.
Platform Selection Criteria
When evaluating platforms, score each option against these factors:
- Per-student cost at your district's scale (not just the sticker price for a small pilot)
- Data residency --- where does student data physically reside?
- FERPA compliance documentation --- does the vendor provide a signed Data Processing Agreement?
- Accessibility features --- does the platform meet WCAG 2.1 AA or higher?
- Integration with your existing LMS (Canvas, Blackboard, Moodle, Google Classroom)
- Maximum concurrent users per session and across the district
- Recording storage --- where are recordings stored, who owns them, and how are they secured?
- Administrative controls --- can IT manage settings centrally, or must each teacher configure independently?
Technical Setup: Step by Step
Once you have selected a platform, the technical setup follows a predictable sequence. Skipping steps here creates problems that surface weeks or months later, usually during a live class.
Step 1: Infrastructure Assessment
Before installing anything, audit your current infrastructure. Document the following:
- Internet bandwidth at each building (upload and download speeds, measured during peak usage hours)
- Wi-Fi coverage maps for every instructional space
- Device inventory --- what hardware do teachers and students have, and what operating systems are they running?
- Firewall and content filtering rules that may block video traffic
- Existing single sign-on (SSO) systems such as Clever, ClassLink, or Azure AD
Step 2: Network Configuration
Video conferencing is bandwidth-intensive and latency-sensitive. Configure your network to support it:
- Quality of Service (QoS) rules: Prioritize video and audio traffic on your network. Assign video conferencing traffic to a high-priority queue so that it is not competing with file downloads or software updates.
- Firewall exceptions: Whitelist the IP ranges and ports required by your platform. For self-hosted platforms like WhiteLabelZoom, configure your firewall to allow WebRTC traffic on the required UDP port ranges.
- DNS configuration: If using a self-hosted or white-label platform, set up the appropriate DNS records (A records, CNAME, SSL certificates) for your custom domain.
- Content filter bypass: Ensure your web content filter does not interfere with video streams. Many school content filters aggressively inspect HTTPS traffic, which can degrade video quality or block connections entirely.
Step 3: Platform Deployment and Configuration
- Create the organizational account and configure SSO integration so that teachers and students can log in with their existing school credentials.
- Set district-wide default settings: waiting rooms enabled, recording permissions restricted to teachers, chat moderation active, file sharing limited to approved file types.
- Create organizational units or groups that map to your school structure (by building, grade level, or department) so that policies can be applied granularly.
- Configure recording storage. If recordings are stored in the cloud, verify that the storage location complies with your data residency requirements. If stored locally, ensure adequate storage capacity and backup procedures.
Step 4: Integration with Learning Management Systems
Connect your virtual classroom platform to your LMS. Most platforms support LTI (Learning Tools Interoperability) integration, which allows teachers to launch virtual classroom sessions directly from within Canvas, Moodle, Blackboard, or Google Classroom. This eliminates the need for students to navigate to a separate application and reduces login friction.
Step 5: Testing
Before any teacher or student touches the system, run structured tests:
- Load testing: Simulate your expected peak concurrent usage and verify that the system performs acceptably.
- Device testing: Test on every device type and operating system present in your inventory. Pay particular attention to Chromebooks, which are common in K-12 and can have performance limitations.
- Edge case testing: Test with low bandwidth connections, test with screen readers, test with students joining from mobile devices on cellular data.
Building a Teacher Training Program
Technology that teachers do not know how to use is technology that will not be used. Training is not optional, and a single one-hour webinar is not sufficient.
Phase 1: Technical Fundamentals (Week 1). Cover the basics: how to start a session, how to share a screen, how to use the chat, how to mute and unmute participants, how to admit students from a waiting room, and how to record a session. Every teacher must be able to do these things without assistance.
Phase 2: Instructional Techniques (Week 2-3). Teaching through a screen is a different skill than teaching in a classroom. Train teachers on using breakout rooms for small group work, polling for formative assessment, the whiteboard for collaborative problem-solving, and screen sharing for demonstrations. Provide specific lesson plan templates that incorporate these tools.
Phase 3: Troubleshooting and Classroom Management (Week 3-4). Teachers need to know what to do when things go wrong. Cover common issues: a student cannot connect, audio is echoing, a screen share is not working, a recording failed to save. Also cover virtual classroom management: how to handle disruptive behavior, how to use moderation tools, and when to escalate to IT support.
Phase 4: Ongoing Support. Designate building-level "tech leads" --- teachers who receive advanced training and serve as the first point of contact for their colleagues. Maintain a shared knowledge base with FAQs, troubleshooting guides, and instructional tips. Schedule monthly check-ins to address emerging issues.
Student Onboarding That Actually Works
Students adapt to new technology quickly, but only if the onboarding is designed with their perspective in mind. A successful student onboarding program addresses three areas.
Access verification. Before the first virtual class session, verify that every student can log in, that their audio and video work, and that they can access the platform from their primary device. Do this as a standalone activity, not during an actual lesson. Send families a one-page setup guide with screenshots, and provide a test session link that students can use to verify their setup independently.
Expectations and norms. Publish a clear set of virtual classroom expectations. Cover camera usage (required, encouraged, or optional), muting protocol, how to use the raise-hand feature, chat etiquette, and what to do if they lose their connection. Frame these as classroom norms, not rules. Students are more likely to follow expectations they helped create.
Technical support pathway. Students need to know exactly who to contact and how when something goes wrong. Create a simple flowchart: try restarting the app first, then contact your teacher via chat or email, then contact the help desk. Provide the help desk contact information in every virtual classroom session description.
Managing Virtual Classroom Behavior
Virtual classroom management is fundamentally different from physical classroom management. The tools are different, the dynamics are different, and many of the intuitive strategies that work in person do not translate.
Use platform moderation features actively. Most platforms allow the host to mute participants, disable private chat, control screen sharing permissions, and remove disruptive participants. Configure these settings before each session rather than reacting in the moment.
Establish a co-host model. Assign a teaching assistant, aide, or second teacher as co-host. While the lead teacher focuses on instruction, the co-host monitors the chat, manages the waiting room, handles technical issues, and addresses behavioral disruptions. This division of labor is essential for classes larger than 15 students.
Address "Zoom fatigue" through session design. Virtual attention spans are shorter than in-person attention spans. Design sessions with variety: alternate between direct instruction, interactive polling, breakout room discussions, and independent work time. Avoid sessions that are 45 minutes of one person talking into a camera.
Document and follow up. Record instances of disruptive behavior using the same documentation systems you use for in-person incidents. Virtual misbehavior should be addressed through the same behavioral framework as physical classroom misbehavior. Consistency matters.
Accessibility Requirements and WCAG Compliance
Virtual classrooms must be accessible to all students, including those with disabilities. This is not optional. It is required under Section 504 of the Rehabilitation Act, the Americans with Disabilities Act (ADA), and the Individuals with Disabilities Education Act (IDEA).
WCAG 2.1 AA is the minimum standard. The Web Content Accessibility Guidelines (WCAG) 2.1 at the AA level is the widely accepted benchmark for digital accessibility in education. Your virtual classroom platform must meet this standard. Key requirements include:
- Keyboard navigation: All platform functions must be operable using a keyboard alone, without requiring a mouse.
- Screen reader compatibility: The platform must work with assistive technologies like JAWS, NVDA, and VoiceOver.
- Closed captioning: Live automatic captions must be available, and the accuracy rate should be monitored. Automatic captions alone may not be sufficient for students who are deaf or hard of hearing. Consider providing CART (Communication Access Realtime Translation) services for those students.
- Color contrast: All text and interface elements must meet the minimum contrast ratios specified in WCAG 2.1 AA (4.5:1 for normal text, 3:1 for large text).
- Adjustable text size: Students must be able to resize text without loss of content or functionality.
- Alternative text for shared content: Any images or visual content shared during sessions should include descriptions.
Test accessibility with actual assistive technology. Do not rely solely on automated accessibility checkers. Have a user who relies on a screen reader test the platform. Have a user who navigates by keyboard test every workflow. Automated tools catch approximately 30% of accessibility issues. Human testing catches the rest.
Bandwidth Planning for Schools
Insufficient bandwidth is the most common cause of poor virtual classroom experiences. Planning for bandwidth requires understanding both the math and the real-world conditions that affect it.
Bandwidth Requirements Per Stream
A single video conferencing participant typically requires:
| Quality Level | Download | Upload |
|---|---|---|
| Audio only | 60-80 Kbps | 60-80 Kbps |
| Standard video (360p) | 0.5-1 Mbps | 0.5-1 Mbps |
| HD video (720p) | 1.5-2.5 Mbps | 1.5-2.5 Mbps |
| Full HD (1080p) | 3-4 Mbps | 3-4 Mbps |
| Screen sharing (receiving) | 0.5-2 Mbps | --- |
Calculating District-Wide Requirements
Multiply the per-user requirement by the number of concurrent users during peak periods. Then add a 40% overhead buffer for network protocol overhead, other concurrent traffic (email, LMS, web browsing), and performance headroom.
Example calculation for a school with 500 students and 30 teachers:
If 200 students are in virtual classrooms simultaneously at 720p, the minimum bandwidth requirement is 200 x 2.5 Mbps = 500 Mbps download. Add the 40% buffer: 700 Mbps. This is just for video. Add bandwidth for LMS traffic, email, web browsing, and software updates happening concurrently.
Practical Recommendations
- Conduct bandwidth testing during peak hours, not during summer or after school hours. The number that matters is the bandwidth available when everyone is using the network.
- Upgrade Wi-Fi before upgrading internet bandwidth. In many schools, the bottleneck is not the internet connection but the internal Wi-Fi network. A 1 Gbps internet connection does nothing if the Wi-Fi access points in classrooms can only deliver 100 Mbps.
- Segment your network. Place video conferencing traffic on a separate VLAN from general internet traffic. This prevents a student streaming video on YouTube from degrading a live classroom session.
- Consider a self-hosted platform to reduce external bandwidth consumption. When the virtual classroom server runs on your local network, traffic between on-campus students and the server stays on the LAN and does not consume internet bandwidth.
FERPA Compliance for Virtual Classrooms
The Family Educational Rights and Privacy Act (FERPA) applies to every virtual classroom session that involves students at schools receiving federal funding. This covers virtually every public school and most private schools in the United States.
What FERPA Requires
FERPA protects "education records," which includes any records directly related to a student that are maintained by an educational agency. In a virtual classroom context, this includes:
- Session recordings that show students' faces, names, or voices
- Chat logs from virtual classroom sessions
- Attendance records generated by the platform
- Any student work shared or submitted during a session
Compliance Requirements for Your Platform
Your virtual classroom platform vendor must sign a Data Processing Agreement (DPA) or be designated as a "school official" under FERPA's school official exception. This agreement must specify:
- What student data the platform collects
- How that data is used, stored, and protected
- That the vendor will not use student data for its own purposes (including advertising or product improvement)
- Data retention and deletion policies
- Breach notification procedures
Self-hosted platforms simplify FERPA compliance significantly. When you host the virtual classroom infrastructure on your own servers, student data never leaves your control. There is no third-party vendor with access to education records, which eliminates the need for complex DPAs and reduces your compliance risk surface to your own security practices --- which you already manage under FERPA for all other student data systems.
Practical FERPA Steps
- Obtain signed DPAs from every vendor whose platform touches student data.
- Configure recording permissions so that only authorized staff can initiate and access recordings.
- Establish a retention schedule for recordings and chat logs. Do not store them indefinitely.
- Train teachers on what constitutes an education record in the virtual classroom context.
- Notify parents about the use of virtual classroom platforms and what data is collected, as required by your district's annual FERPA notification.
Frequently Asked Questions
How much does virtual classroom platform setup cost for a school district?
Costs vary dramatically based on the approach. Cloud-based platforms like Zoom Education run $5-$15 per user per month at educational pricing, which for a district of 5,000 users means $25,000-$75,000 annually. Google Classroom and Meet are included with Google Workspace for Education Fundamentals at no cost, but premium features require paid tiers. Self-hosted options like BigBlueButton have no licensing cost but require server infrastructure ($200-$500/month for a mid-size district) and IT staff time. WhiteLabelZoom operates on a one-time license model, which eliminates recurring per-user fees and typically pays for itself within 12-18 months compared to subscription platforms.
How long does it take to set up a virtual classroom system for an entire school district?
Plan for 4-8 weeks from platform selection to district-wide deployment. Week 1-2: infrastructure assessment and network configuration. Week 2-3: platform deployment, SSO integration, and LMS connection. Week 3-4: teacher training Phase 1 and 2. Week 4-6: student onboarding and testing. Week 6-8: full deployment with ongoing support. Rushing this timeline leads to avoidable problems during live instruction.
What internet speed does a school need for virtual classrooms?
As a general guideline, plan for 2.5 Mbps per concurrent video user at 720p quality, plus a 40% overhead buffer. A school with 200 concurrent virtual classroom users needs approximately 700 Mbps of available bandwidth. However, the real bottleneck is often Wi-Fi capacity, not internet speed. Ensure your wireless access points can handle the concurrent device load in each classroom.
Is Zoom FERPA compliant for schools?
Zoom offers a K-12 compliant configuration and will sign a FERPA-compliant DPA with school districts. However, FERPA compliance is not automatic. It requires specific configuration: disabling certain data sharing features, restricting recording access, and ensuring that the signed DPA covers all data the platform collects. Districts must actively configure and maintain these settings. Self-hosted platforms avoid this complexity entirely because student data never reaches a third-party server.
What accessibility features are legally required in a virtual classroom?
Under Section 504, ADA, and IDEA, virtual classrooms must be accessible to students with disabilities. At minimum, this means WCAG 2.1 AA compliance: keyboard navigation, screen reader compatibility, live closed captioning, sufficient color contrast, and adjustable text sizes. For students who are deaf or hard of hearing, automatic captions may need to be supplemented with CART services or sign language interpreters visible in a pinned video window.
How do I handle students who do not have internet access at home?
This is a digital equity issue that the platform alone cannot solve. Common approaches include: distributing cellular hotspot devices to families without broadband, partnering with local libraries and community centers to provide supervised access points, recording all live sessions so students can watch asynchronously, and offering a phone dial-in option for audio participation. Federal E-Rate funding can subsidize some of these solutions.
Can I use a free platform like Google Meet instead of paying for a dedicated virtual classroom?
You can, and for basic use cases it may be sufficient. Google Meet with Google Workspace for Education Fundamentals is free and FERPA-compliant when properly configured. The limitations appear at scale and with advanced instructional needs: limited breakout room functionality, basic moderation tools, less granular administrative controls, and dependency on Google's ecosystem and data practices. If your instructional model requires sophisticated virtual classroom features, a dedicated platform will serve you better.
How do I prevent "Zoom bombing" and unauthorized access to virtual classrooms?
Use multiple layers of protection: enable waiting rooms so that the teacher must admit each participant, require authentication so that only users with school credentials can join, disable the ability for participants to join before the host, restrict screen sharing to the host and co-host, and use unique meeting links for each session rather than recurring personal meeting IDs. For self-hosted platforms, these protections can be enforced as district-wide defaults that individual teachers cannot override.
Key Takeaways
Setting up a virtual classroom platform for a school district is a significant undertaking, but it follows a predictable process. The decisions you make at each stage compound. Choosing the right platform simplifies everything downstream. Configuring the network properly prevents the most common failures. Training teachers thoroughly reduces support burden and improves instructional quality. Addressing accessibility and compliance from the start avoids costly remediation later.
The schools that struggle with virtual classrooms in 2026 are almost always the ones that skipped steps during initial setup. They chose a platform based on name recognition rather than fit. They deployed without testing. They trained teachers on buttons and menus but not on pedagogy. They treated accessibility and FERPA as afterthoughts.
The schools that succeed treat virtual classroom platform setup as infrastructure --- with the same rigor they would apply to building a new wing or upgrading an HVAC system. The technology is mature. The compliance requirements are clear. The implementation path is well-documented. What remains is the discipline to follow it.